


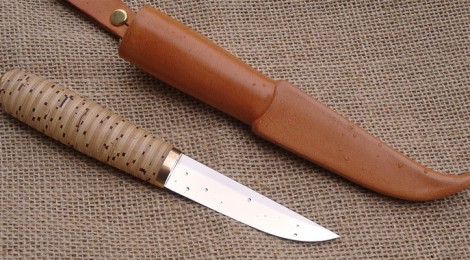
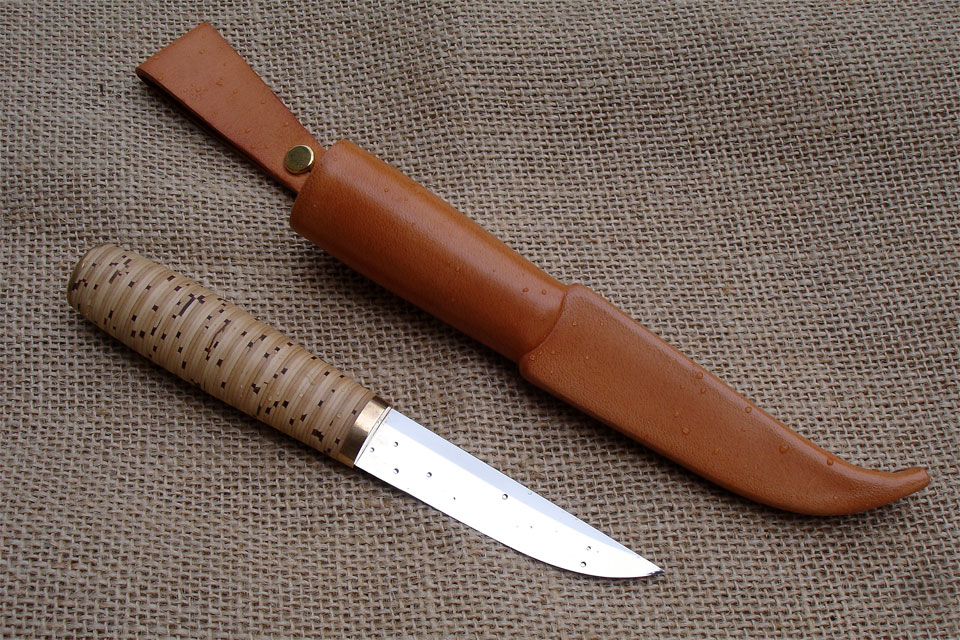
Tuohipuukko (Birch bark puukko) Au Naturel
Because this blog has recently received “great” attention internationally (according to the latest traffic reports). I’m now trying to write in English about my latest puukko.
| date: | 07 / 2012 (serial #: 10 / 03) |
|---|---|
| blade: | Hand forged bearing ring, 18,2° |
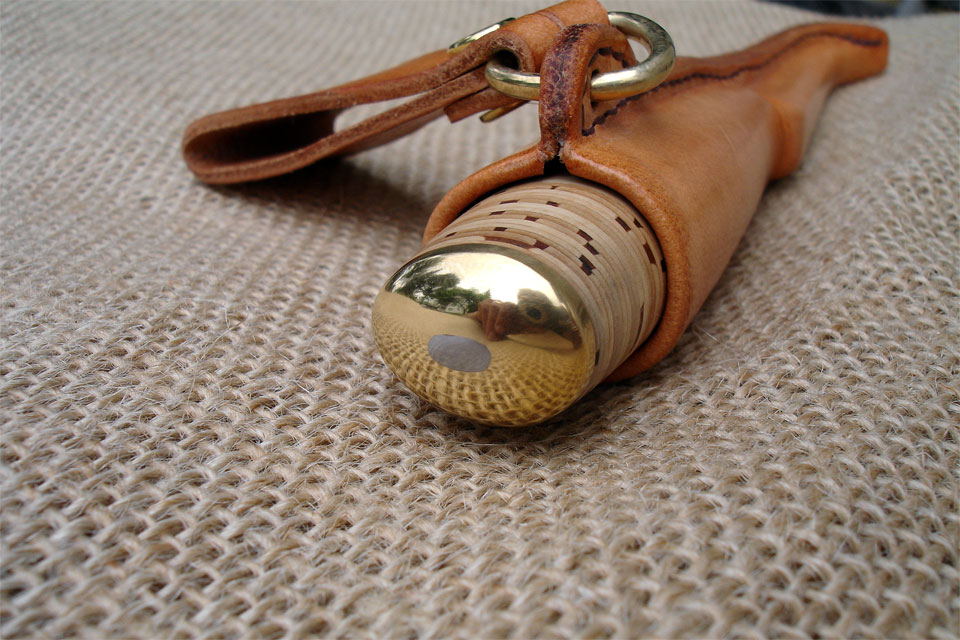
| handle: | Birch bark |
| bolsters: | Brass |
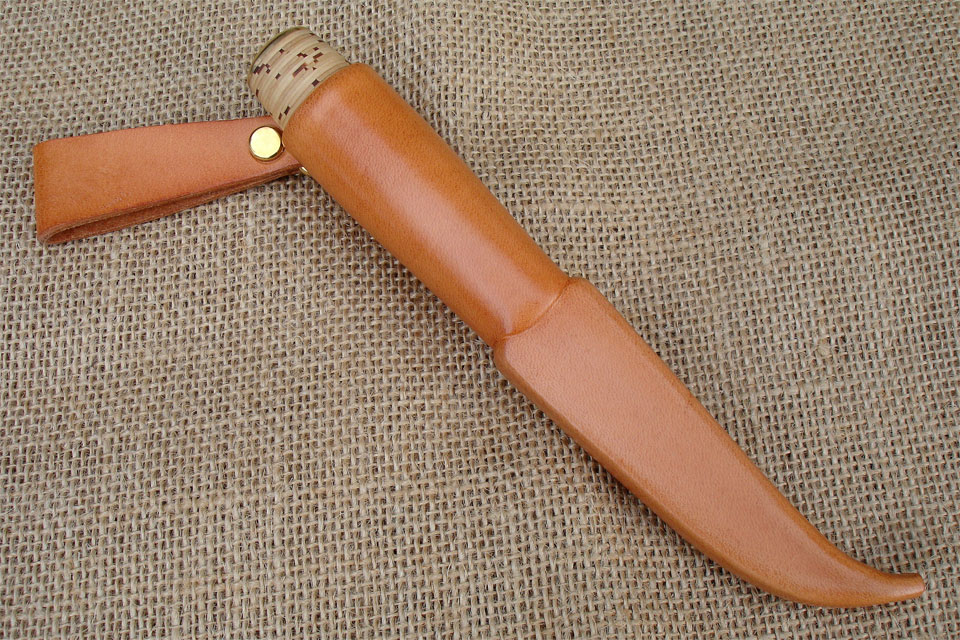
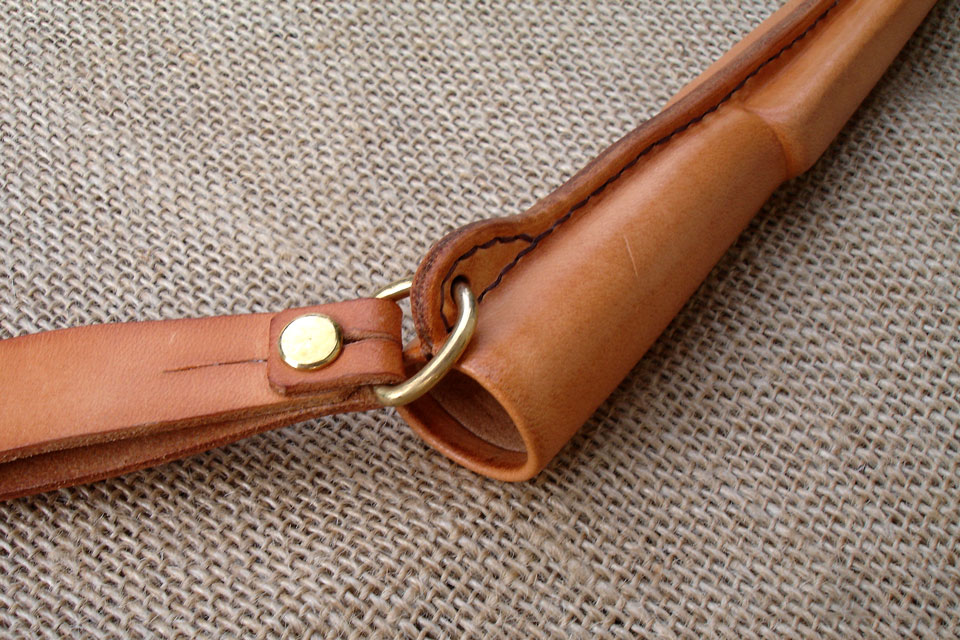
| sheath: | 2,3 mm leather (au naturel) |
| dimensions: | Blade 85, handle 99 and sheath 185 mm |
| (3.35, 3.90 and 7.28 inches) |
This time I wanted to make something more traditional. What would be a better material choices for a traditional utilitarian puukko than carbon steel, birch bark, brass and, of course undyed leather. I also have wanted to try the birch bark for the handle, because I’ve heard that it gives good grip (even when wet) and feels warm to the hand. It’s always nice to learn some new procedures in this great hobby. I also noticed that I haven’t made a puukko with my own blade for myself, so what would be better than make this my tenth puukko for myself.
The blade was forged from the bearing ring with diamond profile. It’s oil hardened (about 830 °C (1526 °F)) and tempered one hour in 200 °C (392 °F). Finally, after the hard grinding job, I gave the blade a mirror-gloss finish. Of course I tested the blade before I etched my sign to it and I started to make a handle.
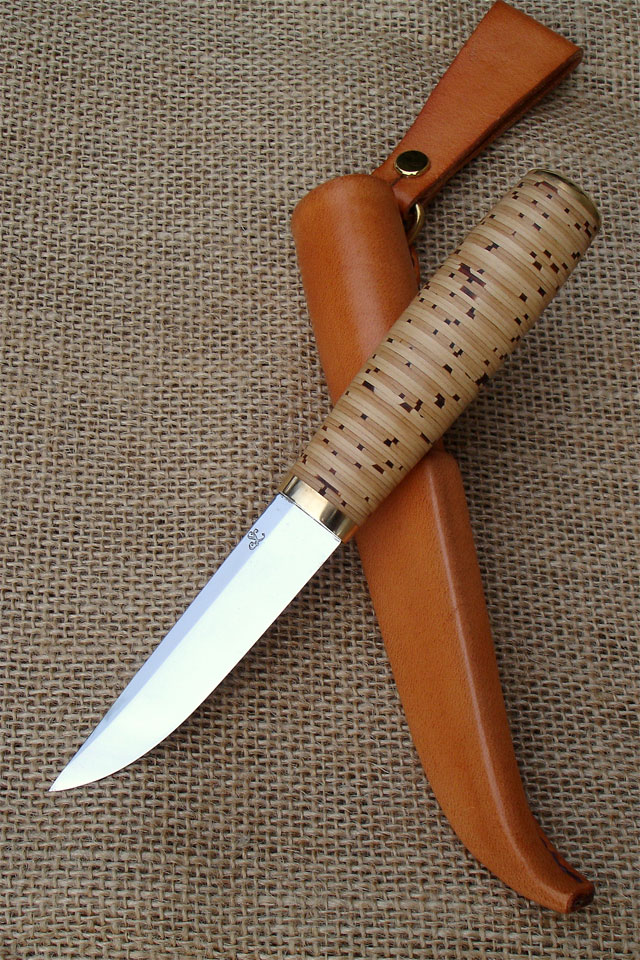
As I mentioned earlier the handle material was new to me. So I had to take little time to study how the birch bark handle was made. First I cut with band-saw couple of hundred spacers from the bark (about 30 x 40 mm). Then I started to pile those spacers on the tang, against the front bolster. Two spacers to same direction and the next two rotated 90 degrees and so on. Every now and then hammering / tightening spacers gently with wooden block. Same two by two method is used at least in old Rautalammi puukko’s. Great way to make tang holes to spacers is to use punch pliers. Finally when there was spacers about 10-15 mm over the final length of the handle I riveted the end bolster.
Next I ground handle almost to final shape and I put whole package in the oven. About half an hour in 100 °C (212 °F). This tightens spacers even more (10 to 15 mm) when the end bolster is riveted permanently. This technique also loosens birch barks own “pitch” and glue the bark spacers to each other.
When the riveting was done. I shaped the handle to its final dimensions. Good thing about birch bark is that it is very resistant to water. So the final shaping can be done under the running water with water sanding paper (brass bolsters don’t smudge the bark). Finally, I used the 2000 grit paper and I also ground the bolsters with it. After that they did not need more polishing.
Rest of the job was just basic puukko making. Handle got transparent antique wax (Liberon Black Bison, Clear) finish. The sheath I sewed with traditional Finnish stitching and upper part of it I thinned and folded. I had never done that before but it went quite well. Because the sheath was meant to be ‘Au natural’ it got clear finish with shoe polish. And the puukko was ready to use.
PS. When I was writing this post. I noticed that there was published a couple of great articles about making of birch bark handle (with great photos). You can find them on the Nordiska Knivar blog: Pekka Tuominen Birch Bark Handle and Joonas Kallioniemi Work In Progress.
Tämä sisältö on luettavissa myös kielellä: suomi
Remarkable craftsmanship. The simple and uncluttered look prevent any distractions and allow one to really enjoy a work of art. Mina asuin suomessa nelja kymmenta yhdeksan vuotta sitten ja kiele on unothtanut mielestani. Haluaisin tilata talaista puukkoa. How would I purchase such a knive. Kiitoksia paljon, Steve Freestone.
Thanks Steven.
Hienostihan tuo suomi näyttää vielä sujuvan :)
Best way to take contact me is by email. You may find the contact information from here http://www.lansipaltta.fi/en/contact/
What is your pricing for simple stacked birch handle puukko? Thank you
Unfortunately I doesn’t sell puukkos at the moment